Mac OS X Users
You have the ability to access your hosted RDP session from a Mac OS X. To access the RDP environment from a Mac OS X, you will need to download the Microsoft Remote Desktop app. The following steps will instruct you on how to access your session using the Microsoft Remote Desktop app.
Please note: If this is your first time logging into the RDP environment and you have not yet created your own password, you will need to do so prior to proceeding with the set up instructions below. You will not be able to successfully log into your RDP session until you have created your own password. Click here for instructions.
- Download the Microsoft Remote Desktop app from the Mac App Store.
- Once downloaded and installed, click and open the Microsoft Remote Desktop app.

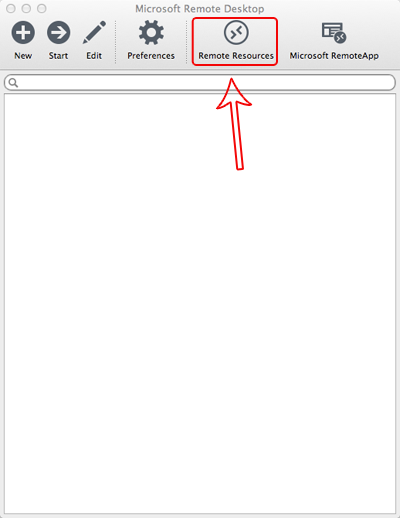
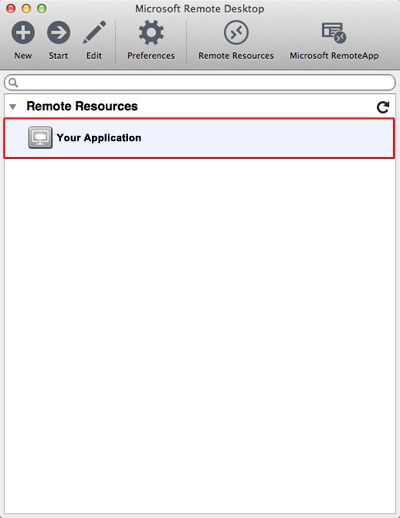
- You will see the following screen. Click Remote Resources.
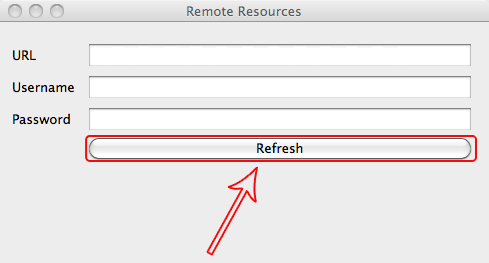
- Fill in the URL (https://cloud.flexibake.com/rdweb/feed/webfeed.aspx), Username and Password fields with the appropriate information. Then, click Refresh.
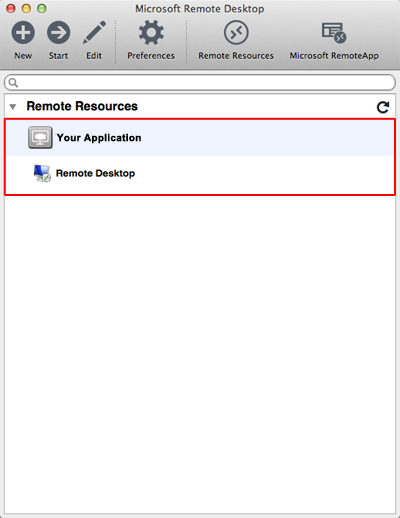
- After clicking Refresh, the application(s)/remote desktop available to you will appear in the Remote Resources window (as shown below).
You have now successfully set up access to your RDP environment on your Mac.
How to Sign In:
- You will always use the Microsoft Remote Desktop application to access your hosted session.
- Once you have set up access by completing the above steps, you can simply launch the Remote Desktop application and select your application or Remote Desktop from the Remote Resources list (shown in Step 5) for future logins.
- If you selected your application icon, the application will open.
- If you selected the Remote Desktop icon, you will be taken to your remote desktop.
- Please note that upon your first login you will need to set the local drive that will be accessible from the remote session.
- Click the dropdown, then click browse
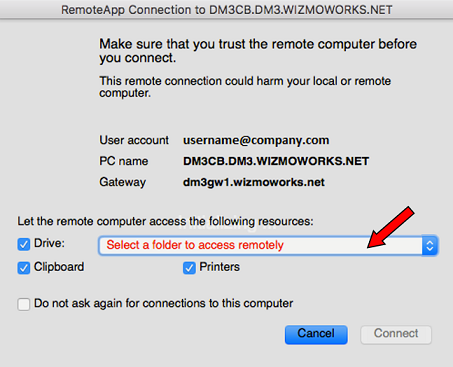
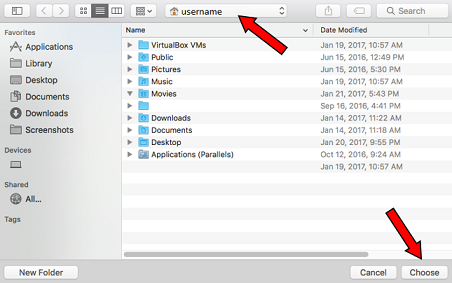
- Use Shift + Command + H to select the users Home Folder or select the Home Folder from the Dropdown and click Choose.
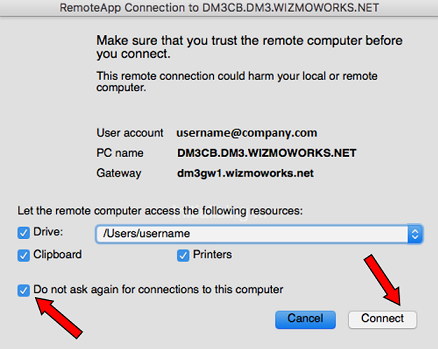
- Make sure the Drive path is set to /Users/username (username is an example) Check the box “Do not ask again…” and click Connect.
- Download the Microsoft Remote Desktop app from the Mac App Store.
- Once downloaded and installed, click and open the Microsoft Remote Desktop app.
- You will see the following screen. Click Remote Resources.
- Fill in the URL (https://cloud.flexibake.com/rdweb/feed/webfeed.aspx), Username and Password fields with the appropriate information. Then, click Refresh.
- After clicking Refresh, the application(s) available to you will appear in the Remote Resources window (as shown below).
You have now successfully set up access to your RDP environment on your Mac.
How to Sign In:
- You will always use the Microsoft Remote Desktop application to access your hosted session.
- Once you have set up access by completing the above steps, you can simply launch the Microsoft Remote Desktop application and select your application from the Remote Resources list (shown in Step 5) for future logins.
- Please note that upon your first login you will need to set the local drive that will be accessible from the remote session.
- Click the dropdown, then click browse
- Use Shift + Command + H to select the users Home Folder or select the Home Folder from the Dropdown and click Choose.
- Make sure the Drive path is set to /Users/username (username is an example) Check the box “Do not ask again…” and click Connect.
- Download the Windows App app from the Mac App Store.

- Once downloaded and installed, click and open the Windows App application.
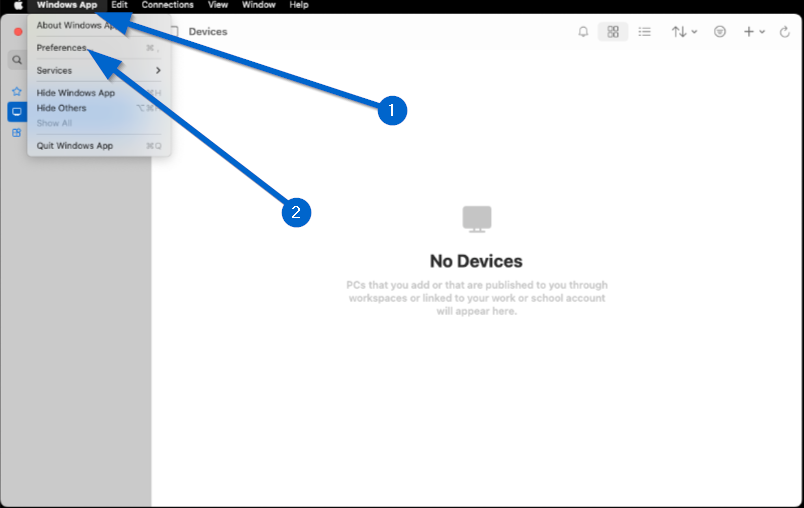
- Click on Windows App and choose Preferences.
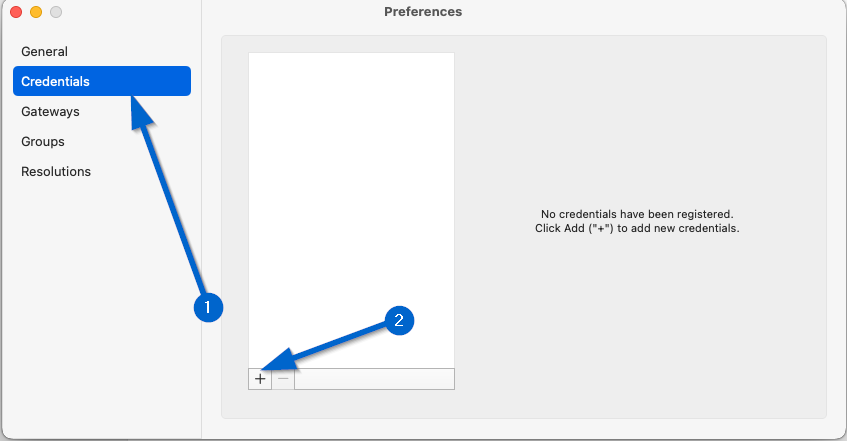
- On the Preferences window click on Credentials and then click on the + sign to access the Add User Account pop-up.
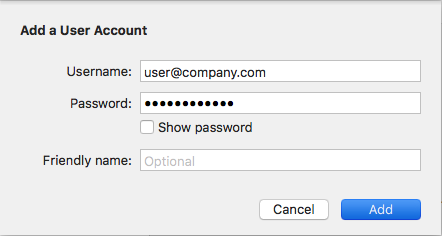
- Fill in your User Name and Password in the Add User Account pop-up and click Add.
- Close the Preferences window to return to the main screen.
- Click on Devices then the + sign to add a new Workspace.
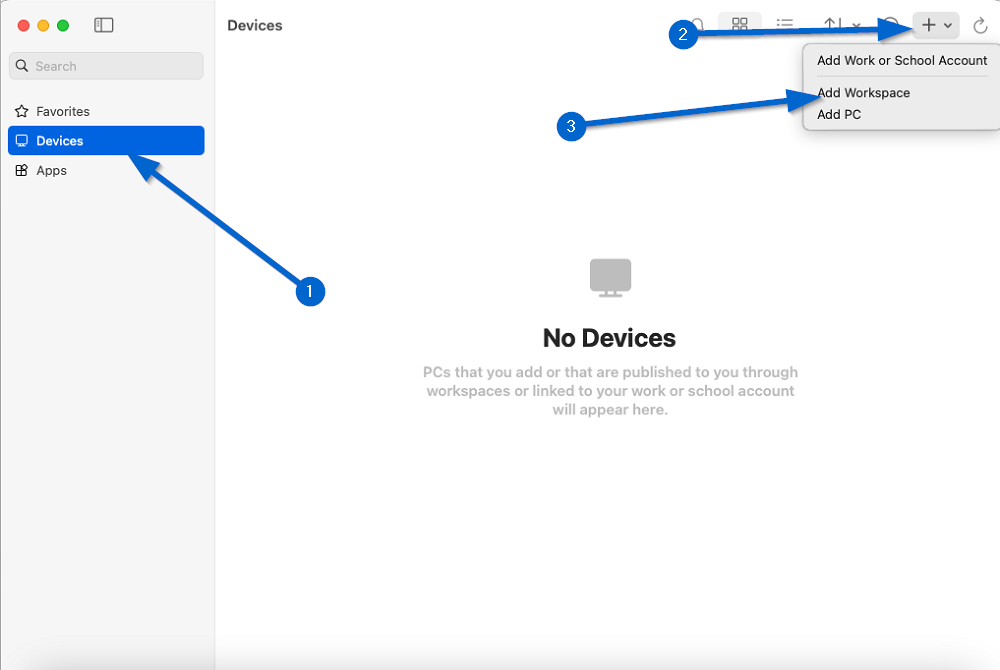
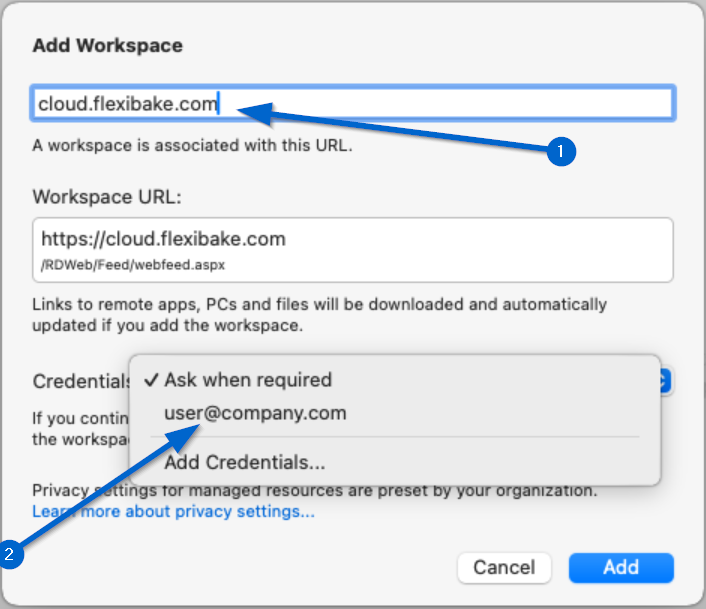
- Fill in provided URL (https://cloud.flexibake.com/rdweb/feed/webfeed.aspx). Then select your account from the drop down list and click Add.
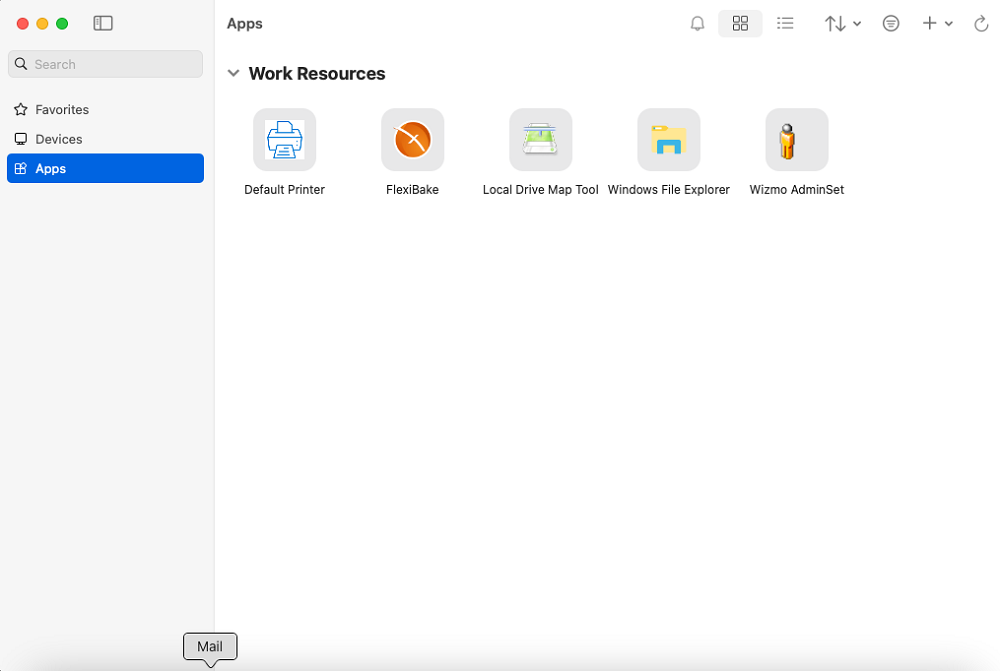
- Double click on your new Work Resource to log into the hosted environment..
You have now successfully set up access to your RDP environment on your Mac.
How to Sign In:
- You will always use the Windows App application to access your hosted session.
- Once you have set up access by completing the above steps, you can simply launch the Windows App application, click Apps and select your resource from the Work Resources list (shown in Step 9) for future logins.